Showing posts with label Blogger Tips. Show all posts

Sunday, May 7, 2017

Best Free Online Logo Maker Sites with Create Customize Logo free | Ibuildblog

A Logo is powerful identity when you register or Start website or Blog, it may be company slogan, name or icon which can interact website theme. A logo which would help people in know your business, but logo making is not easy process. You need hire professional designers to spend thousands of dollars. There are numbers of free online logo maker sites and tools that help you to design attractive logo yourself.

In other words, if you want to create your own custom logo free without paying any money to professional designers, there are many free online logo makers to help you in this.

Best Free Online Logo Making Sites to Create Custom Logo
There is the free online logo making sites that help you to design a professional logo but not all of those online logo making sites, some pay logo designing cost. But I am sharing that logo making site which totally free to create the logo.

Online Logo Maker
This site is one of the best sites to create free online logo online and my favorite site. It doesn’t require any technical design skills In this site you can simple enter your company name, insert different shape, upload images etc.


Graphic Spring Logo Creator
Graphics Spring another great online logo creator site. There are numbers of logo types depending on your business like Food and drink, Abstract, Letter based, Education, Animal and much more.
Here you can also hire someone from their team to create a totally custom logo for you are not happy with their logo creator.

Design Mantic
Design Mantic is yet another free logo creator that allows you the custom logo for free. You can choose the different types of categories like Art & photography, Education, Insurance, Home & Garden and much more. In this site you don’t need any special designing skill, in this, you can create a free logo.

Logaster
Logaster is online logo generators which helps you to create your logo within few mintues. Here you can browse thoushand of logos, all of logo you can customizable in terms of name, slogan, type of business and color. After design logo you can download with the format of JPEG,PNG, PDF and SVG.

Logo Type Make
LogoTypeMaker is free logo generator tool allows you to create your own logos in less 2 minutues. Here you can simple enter your company’s brand name and click to generate logo button. After that, it provides various free as well as customizable logo designs.


You may select categorize of logo design based on your industry, you can also edit or customize the logo and get your logo free. You can also change the color, size, font size, shape and play with positioning and art.

Logo Snap
Logo Snap is another free online logo maker website to design different type of stylish logo with effective design. It can offer you to create logo in three easy steps.


First step - you can choose or select the category of your profession.
The second step – you can choose your design style or symbol.
And the last step you can customize your logo as per your choice. Once customize is complete you can either save or download. For this, you can login to your account.

Logaster
It is one of the best online logo generators which helps you to create your own logo in few minutes. Here you will find hundreds of logos, all of which are customizable name, slogn, type of business and color.it is quick online logo maker as you may quickly create logos with its four steps process.
First, you need to select your brand industry, next you need to choose the logo, then edit logo and customize the layout after that all save your logo design and download logo free.  You can save logo as JPEG, PDF, PNG, and SVG.


Logo Genie
Logo Genie is another free logo making site that lets you create stunning logo free.it provide the DIY editor with metallic finish effects and special symbol effects the site provides. It provide three steps to designing process first you select the category of your company, inserting text and last download your design logo


Some feature like you can set the color, alignment, size easily.

Logo Garden
Logo garden is another free online logo making a website that allows you to create your logo for free. It creates logo with DIY (Do – it- yourself) and design logo with useful steps first you select the category of your company, then insert the selection symbol and finally customize color and text.
The website provides some feature like metallic finish and ultimate symbol effects are.

Monday, February 13, 2017

Top 5 High Paying Mobile Ad Networks for Publisher -2017

Now time, In Global Marketing Mobile Phone traffic increasing the rapid pace. So the publisher is making responsive and mobile friendly website to cater the needs of this audience.  There’s also huge revenue generate opportunity through ads designed special y for mobile platforms. In the mobile ad, networks platform offer both developer or publishers to the lot of ways to promote their ads throw mobile apps or website.
So in this article, we talk the best mobile ad networks that can help the users to make a huge amount of money. You can use these option till you feet that you are absolutely satisfied with the results. Before I discussed there are 5 major top ad networks format that supports

MOBILE AD FORMATS
  • Interstitial -  Full-Screen Ad
  • Banner – static or animated image ad
  • Native – either image or  video ad which displays according to app function
  • Offer Wall – this ad unit within a mobile app that provides end users with lots of offers to engage in.
  • OS – it allows to show an ad on the mobile phone to running specific operating system.

Top mobile ad networks List are: - 

AdMob is one of the best mobile ad network and develop in 2006. This ad network belongs to under Google themselves, this ad network run on iOS, Android and Windows Phones. the mobile traffic model is based on CPC and CPM


Feature of Admob
  • Ad Format – Banner,  Native, Android, Video, Interstitial
  • Mobile Platform - Android, Window
  • Campaign types – CPM, CPC CPI
  • Targeting – Country region, mobile platform, OS version,
  • Minimum Payment - $100
  • Payment schedule – Wire transfer, check, paypal etc

InMobi is a mobile advertising platform which operates on iOS, Android and window phones it can offer wall , push notification, incentive, app display, video and rich media with mobile traffic type CPC and CPM.


Feature of InMobi
  • Mobile Platforms – iOS, Android , Window
  • Campaign types –CPC CPI
  • Targeting – Country region, mobile platform, OS version,
  • Minimum Payment - $100
  • Payment schedule – Wire transfer, check, paypal etc

AirPush is another greate mobile app monetize website which operates on almost all mobile platforms like iOS, Android, Blackberry, window or java phone. It founded by Asher Delug in December 2010 in Los Angeles, US.


Feature of AirPush
  • Ad Format – App Icon, Messaging, Notification, Offerwall
  • Mobile Platforms – iOS, Android , Window, Java
  • Campaign types –CPC CPM
  • Targeting – Custom
  • Minimum Payment - $100
  • Payment schedule – Wire transfer  $10 or  paypal - $50 etc

It is another online advertisement company founded in 2011. It maintains daily biggest ad network over 650M daily advertisement impression across the globe. Propeller Ads more than 6,000 publishers and more than 100,000 sites registered in the network.


Feature of Propeller Ads
  • Ad Format – Display Banner, Slider layout, Direct Link, Mobile Dialog Banner, Mobile Banners
  • Mobile Platforms – iOS, Android
  • Campaign types –CPC, CPM, CPL, CPA
  • Targeting – Geo Location, OS, device, wifi or mobile connectivity
  • Minimum Payment - $100
  • Payment schedule – Wire Transfer, PayPal

it is another good ad network for publishers or developer which specialize for Android, Windows Phones, BlackBerry, or java phone which operate on mobile to display Banner, interstitial, interactive video and rich media ad support


Feature of mMedia
  • Ad Format – Display Banner, interstitial, interactive video
  • Mobile Platforms –  iOS, Android, Window, Java, BlackBerry, Symbian, and WebOS
  • Campaign types – CPC, CPM, CPA
  • Targeting – Geo Location, OS, device, wifi or mobile connectivity
  • Minimum Payment - $100
  • Payment schedule – Wire Transfer $500, PayPal -$50
In above we provide best mobile ad network which you can choose one of them and optimize the mobile app ads


Tuesday, May 24, 2016

How to add chat box in Blogger

Chatwee is a new chat service, unlike other Chatwee is added as a toolbar and chat deployed on the right side (you can switch to the left), showing the flag next to the user depending on the country where connect. Its design is attractive, however the functions are very limited because you can not choose a nickname unless you register, and so far I still do not know how to change the avatar once you're registered. But yes, it has the advantage of allowing users to share files such as PDF, music and photos.
Once you register you'll have the code you can use on your blog, you can also customize the colors of it.
Step of add chat box in Blogger-
  1. Enter the address in address bar www.chatwee.com.
  2. Click the singup and it just like.
      Register a account with singup .
        After registration you can login with username and password.
       Open the Dashboard and copy the Below code.
        
Step 2
  •       Login Your Blogger Account.
  •   Click On the Layout and Select the Html/javascript Code. 


  •       Then paste the code which you copy  and click save.
  •        See the desired Output.
Another Chat Box Sites-


Saturday, May 21, 2016

How to add Facebook fan or like page to blogger - ibuildblog

Facebook is Great social Networking media to permote your self or product.The Facebook box will help your visitor to become a Regular Reader just by clicking like Button. A fan box allow great attract your blog more visitor or readers to like your Facebook fan page not leaving the like go here .you can see how many user already liked your page. The visitor can also read recent post  and update new post with Facebook page. 

how to add facebook page in blogger

How create Facebook Fan Page

  • Login your Facebook page.
  • Click on the setting gear on the top right-hand corner of your page. You can find it to the far right of the page.
  • Click on “Advertising” and create a page.


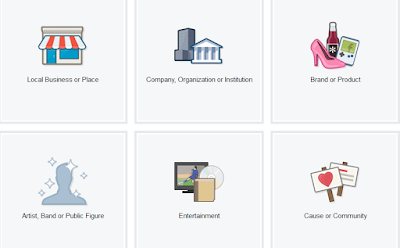
  • Click on the type of page you’d like create such as local business or place, company organization, Brand or product, Art Band or public, Entertainment, Cause or community such as.
facebokk page type
  •  Click on “Get started” you will be able to start adding some information for your page.
  • Next you upload photo from  your computer or website.
  • Next you can complete About section provide the information and description and click save information.

How to Add Facebook like Page in Blogger

  • Login to your Facebook id and Facebook developer page.
  • Get your Facebook page id URL by visiting your Facebook fan page.
  • Paste the URL Parameter of your fan page and set height and width of the page.

    • After that you get the code button when done. You will be given two codes , titled iframe and XFBML. You need the iframe code.

      • The iframe code should like this (do not copy this ).

        • Copy the code.
        • After all above steps Login  into the blogger.
        • Select the layout  and click the add gadget link.
        • Select the HTML/JavaScript gadget and paste the code. 

          • Save the code and view your blog
          Author Deskif you have any problem then feel free contact us or leave comment below in comment box.

          Monday, May 9, 2016

          How to Create New categories in Blogger - ibuildblog

          Blogger Blog does not support categories but only come with labels, WordPress has categories widget, we can add categories to WordPress blog with category widget. But blogger doesn't have category widget to create categories. But we create the category in blogger blog manually. There are a number of methods are create the category in blogger blog using Labels gadget, Linklist and anchor tag. But simple to create category using Labels gadget. The category is a very important section of any blog or website Because with the help of categories people can easily find what they are looking for.
          This Blogger tutorial will show you to manually create categories in blogger from existing labels.

          Read More - How to Backup and Restore Blogger Template

          How to Create Categories from Labels in Blogger
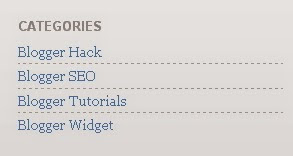
          One easy way to create a categories section in Blogger is to simply rename the title of the label widget as categories. You can place a number of post under different Labels.
          Steps are follows
          • Login to Blogger Account.
          • After in Dashboard you can select the Layout in the left side.
          • Click on add gadget and select the Label Gadget.

          • Give the Name to Label gadget as a Categories.

          • Click on save gadget.
          After creating Label gadget into your blog, Next you add Labels to your all posts in your blogger blog. After adding Labels to your Posts then you can see label names under category in your blog. It is the simple way to create the category.

          Another Way to create category Method

          We can also create category using Link List gadget in Blogger. The steps are given below to add link list.
          • Login to the blogger account.
          • Select the layout from the left side in blogger dashboards.
          • Click on add gadget and then select the Link List Button then configure the link list as follow.
          Title : Category Name
          A number of links show in list: Insert the number of links another wise it leave the Blank.
          Sorting : select either alphabetical order to reverse.
          New site URL:  insert the new site URL such as http://www.ibuildblog.com/.
          Site Name : Insert the site name
          • Next click on add link apply the same process if you want to add another entry.
          • Last Save the link list gadget.
          Author Desk : if you have any problem then feel free contact us or leave comment below comment box

          Wednesday, May 4, 2016

          How To Add Contact Form in Blogger - ibuildblog

          Contact form is simple to contact any person with you. Having a contact page on your blog is highly important. It is how visitors, brands, and companies can reach you and it’s something that every blogger should have. If sharing your email address on your blog is not your cup of tea, a contact form can serve as an easy way for others to get in touch. Adding a contact form to Blogger can be done with a few coding tweaks.
          If you do go the route of using a contact form, I do suggest that you also include an email address on the Contact page as well. You can set one up specifically for your blog if you don’t want your personal email address to be seen. The reason I believe this is so important to offer both options is because most brands and companies will not fill out a contact form to contact you. They usually want to email you through their own email client and add you to their contacts.
           Blogger actually offers a free contact form for your blog, unfortunately they’ve made it as a Gadget and placed it on the Layout page so that it is added to your sidebar. Not the ideal place for a contact form, if you ask me! It should be situated on its own page, so here’s how to set it up that way:

          Add contact form gadget

          1.Access your blog Layout


          2.Click on any Add a Gadget link. An Add a Gadget window will be shown, click on More    Gadgets, and choose add Contact Form.


          3.On Configure Contact Form Widget window, click Save button.
          After added Contact form gadget, please drag and drop it below Blog Posts gadget, then click Save arrangement button.


          Read More - How to add Chat Box in Blogger

          Tuesday, May 3, 2016

          How to Use Pinterest for Beginners "Getting Started" Guide | ibuildblog

          You heard about Pinterest, but curious about what it is and how use it? Follow this easy guide to joining and learn about all Pinterest.

          What is Pinterest

          Pinterest is social networking site that shares images and videos their own personal media collection. Pinterest is founded in 2009 by Cold Brew Labs, Pinterest is work based on “Pins” and “Boards”. Boards mean collection of photos on any topic you choose to pin about. On the Pinterest website, the word pin used to mean any image added to Pinterest, while Board means the collection of Pins.
          Pinterest is divided into numbers of categories include Architecture, art, Crafts, fashion, food and drink, science and travel. Users can add a “Pin it” button to their browser and then select to “Pin” online images to virtual pinboards which are to organize categories with a detail of description. You can follow boards when you find one that is of interest and will notify when it’s updated, you will also receive a notification when another user “repins”.

          How to Join
          Sign Up
          • Visit Pinterest.com and then click join Pinterest. You will join using email, Facebook or Twitter.
          • You can Sign up using your email address then you can insert your Full Name, Age and select Gender. Uploaded profile photo and proceed.

          Follow Few Boards
          • Once you create your account, you’ll need to find some boards to fill your feed. They suggest some categories such as Design, Geek, Science & Nature and Technology among others. You have selected least five boards to continue.
          Verify your Account
          • After selecting some boards you’ll receive an email confirmation. Once your account is verified next screen you’ll see is your home feed, which features the most recent pins from people which you follow.

          How to pin

          Create New Board
          • After account verify you need to create Some board to order to collect and organize item you’re interested in for this you can create a new board on your account, Click the “Add +” button in the upper right-hand corner of your main Pinterest page. Then the box will pop up asking you to name of  your board, add a description, and categorize it. The category option is set by Pinterest , so you select one of or choose “other” for those wildcard boards.
          Get Pin
          • After creating successful Board, now you’re ready to get pinning you can peruse the pins of people you follow on your home feed or more selecting a category from the drop down menu in upper left hand  over it and click the red Pin it button that appears in the upper left-hand corner. You will be asked to design it to one of your boards and add a description.

          Add a Pin it Button to Your Browser
          • This is an amazing little tool, it will install that little button you see in the picture at the top of your browser. When you're on a web page just click that button to pin an image straight from the source. It’s super quickly and easy if you never pin anything new

          Repin from your feed
          • If someone you're following has added a pin that you like, you can save it to one of your boards as well. Simply hover over the image on Pinterest and three buttons will appear- repin, like and comment. To add that pin to your account click repin and follow the same steps you would add the pin.
          Get Promote Board
          • After creating board or successful upload pins now so it’s time to make some friends. Follow more boards and build out your own to attract new followers. Get friendly by linking( click like next to the Pin It button) and commenting on other pins


          How To Add Categories Section in Blogger - 2016

          Blogger Blog does not support categories but has only comes with labels, In this tutorial  i will show you how to manually create categories in Blogger blog. Category is a very important section of any blog or website, because with the help of categories people can easily find what they are looking for. Now we would manually create category section in blogger from labels, This tutorial is aimed at beginner bloggers, Let me explain how to add category section in blogger blog.

          The first and easiest way to create categories section in Blogger is to rename the section of labels widget as categories. Of-course this is not the appropriate solution for a blog in which there are a huge number of labels. An easy way round this problem is to create a separate categories section.
          ·         Adding categories section to a Blogger blog involves following steps :
          1. First of all, you have to decide how you want to group your articles, according to the labels applied, and what group heading you want to give to each grouping of articles.

          2. Navigate individual page of the label for the first category which you want to use by clicking on the label in a side bar. Copy URL address of this page.

          3. Now go to Dashboard > Layout > Add a Gadget > Link List

          5. Enter "Categories" as the title
          6. In the Configure Link List dialog box, paste the link of the label you've copied from the address bar to  Site URL
          7. Enter the name of your Category
          . Click on Add Link to add the link to your new categories list.

          8. For every label, you wish to put into the Categories Section copy the link and add it to the    Configure Links List. By the end, you will end up with two or more categories in your list

          9. Use the arrow keys to each link to move them according to your choice where you want to          place them.


          Saturday, April 30, 2016

          How to Add a Video to Your Blogger Blog - ibuildblog

          Videos are a great way to show a large amount of information in small space of Blogger makes it

          easy to add video to your blog.You can add Video in Blogger to Many different way Such as
          1. Uploading Video from your computer
          2. Search from Youtube and add video
          3. Add your own Youtube Videos
          4. Upload videos from your phone.
           5. Record video from your computer webcam
          6. Add Video embed code of any video website in HTML Mode.
          Insert  the Video   
           1.      Log in Blogger Account.
           2.      Click New Post  and given the name of a post such as.

          add video in blogger

                         3        Click the insert video in right hand side .
                 4.     After Click on the insert video in blogger post another screen will appeare with  option upload  from computer,youtube,phone etc.


          1. Uploading Video to Blogger Post: See the screen shot about and click on upload and choose the file in your computer. The video will upload to Youtube and add to your blog post.

          2. From Youtube Search: You can add videos from Youtube search also. You can add video already existing in youtube, just type the search keywords and add whatever video you want.

          3. From your own Youtube videos: You can add from your existing videos already uploaded to Youtube.

          4. From your Phone: You can upload videos already taken in your mobile phone.

          5. From your webcam: You can record videos using webcam from your computer and add to your blog post.

          6. From embed code: If you not found the answer from above 5 to add video to blogger or external video other than above 5, use the embed code of any of the video sharing website. The video embed code is look like below code in Youtube.


          Track the Google Analytics code and insert into Blogger template - 2016

          Once you setup your blog and start to publish quality content, it's time to track the traffic statistics to know more about the visitors that who are visiting your blog, from where they are, how much time they spend on your blog etc. Google Analytic is the best tool provided by Google to easily track and check real and accurate stats of our blog traffic. Except this, you can also check your blog’s bounce rate, unique visitors, page views and visits by adding Google Analytic to your blog. Tracking the traffic statistics of a blog is very important if you want to know that what’s going on your blog and the behavior of your visitors. Now you are aware of the benefits of installing GA in a blog so let’s see how to install it.


          Create Google Analytics Account
          Before adding GA tracking code to your blog you need a GA account. Follow below steps: 
          1.  Go to Google Analytics.
          2. Now sign in with your Google or Gmail account.
          3. Click on “Sign Up” button on the next page.
          • Once you click the sign-up button you will redirect to next page there you have to fill a simple form by entering your Blog Title, URL, your Country, Blog Category and Account name. You can enter your blog title as your account name or can choose anything else which helps you to recognize your blog. See below screenshot for the complete process.           
          • Once you fill all the details click on “Get Tracking ID” button.
          • Now click on “I Accept” on “GOOGLE ANALYTICS TERMS OF SERVICE” pop up page.
          • If everything is fine then you will get a Tracking ID like “UA-39xxxxxx-1″ at the top left corner and a Tracking code in a box. Now let’s go to the next step.
          Add Google Analytics to Blogger


          To add GA in your blog you have to perform 2 steps. First, you have to add your Tracking ID in blogger settings and then put the tracking code in your template.
          Adding Google Analytic ID to Blogger

          • Go to Blogger >> Settings >> Other
                

          1. Now under the “Analytics Web Property ID” enter your Tracking ID in the text field.      
          Now you have completed all the process of installing and adding Google Analytic in blogger. It will take approx 24 hours to show your traffic report in Google Analytic. Happy Blogging!
                   
          Author Desk - if you have any problem then feel free contact us or comment in below comment Box.